Unpleasant but true, your Mac hard drive can fail anytime due to logical or physical damage. You can, of course, visit a Genius Bar to get the hardware repaired or replaced, provided your Mac is under warranty. But, for those whose MacBook’s warranty is over, taking your device to the Genius Bar can be expensive. You can save your money by using some native DIY methods to repair the MacBook hard drive. This post talks about various do-it-yourself methods to repair the MacBook hard drive and even shares methods to recover data. Read on to learn.
Disk Utility at Your Rescue
Most of you might not know the importance of Disk Utility and may not even use it for performing any hard-drive-related task. But, Disk Utility is a beneficial native tool provided by macOS that can help you perform the essential disk management task easily and quickly. If you wish to repair your MacBook’s startup disk, perform the following steps:
a) Start or restart your MacBook and then boot it into macOS Recovery mode by immediately pressing and holding the Command + R keys during the startup.
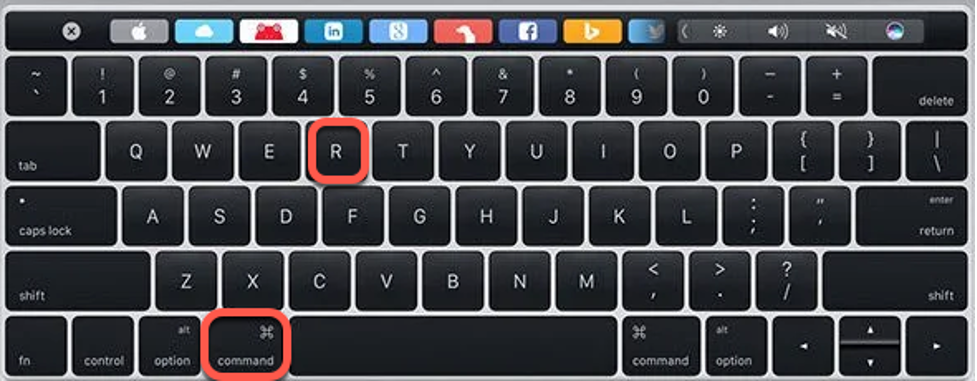
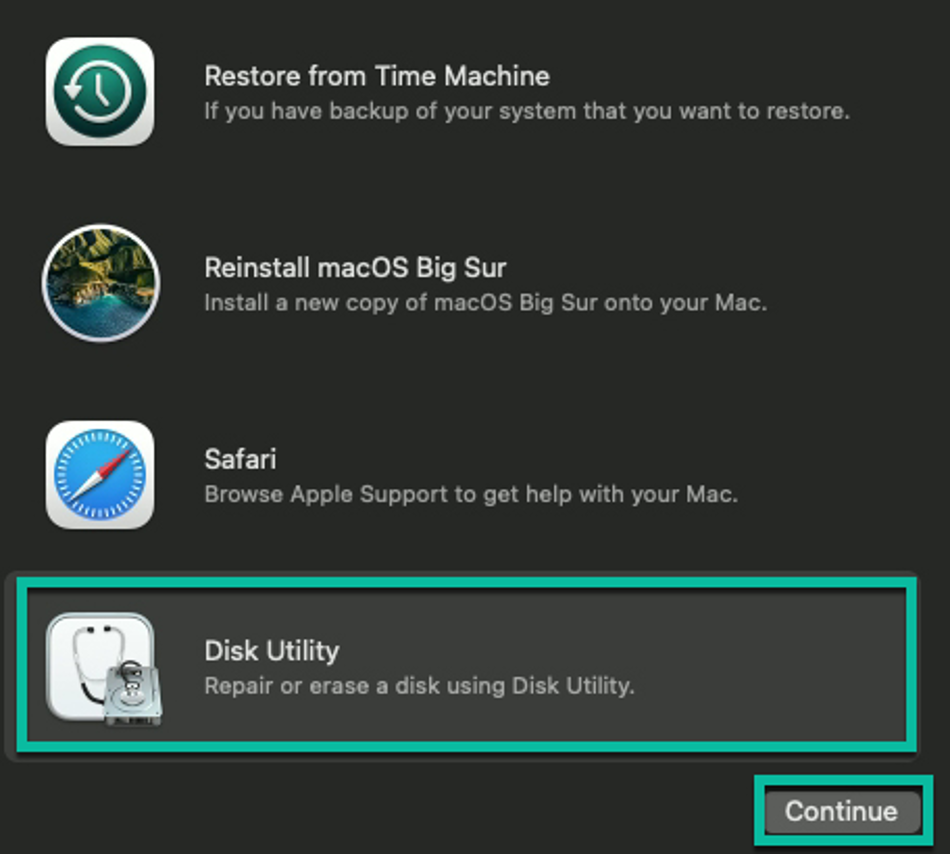
b) Release the keys when the Apple logo appears. You’ll find the macOS Utilities window. From there, you can select Disk Utility and click Continue.
c) In Disk Utility, select the startup disk (Macintosh HD, if you haven’t renamed it) from the sidebar, then click the First Aid tab from the top menu.
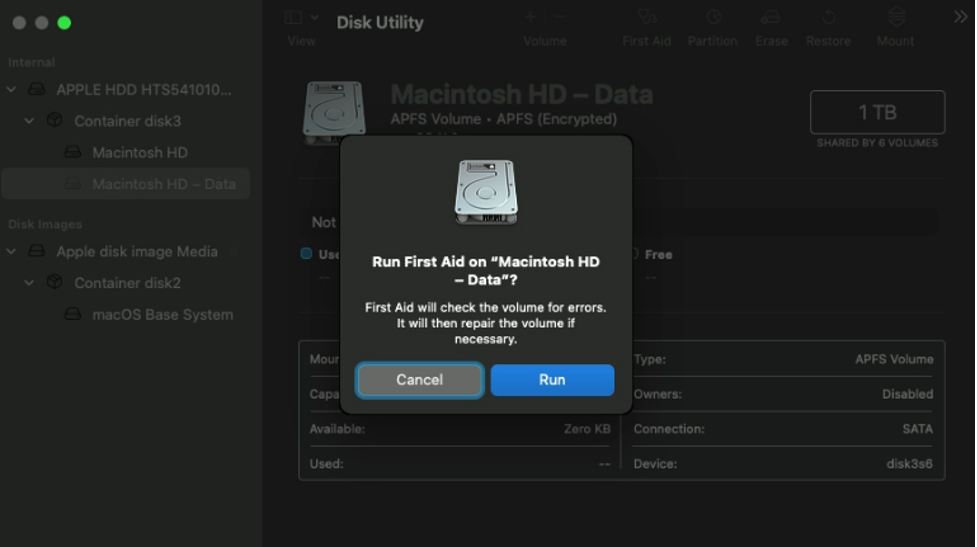
d) You’ll be prompted with a message box; click Run to start the MacBook hard drive repair process. Disk Utility shares report when the startup drive scanning and repairing are over.
e) If the drive repair is successful, use your MacBook hard drive without any issue. But do take Time Machine backup to avoid future data loss.
When the repair fails, try the following troubleshooting method.
Single User Mode at Your Help
Sometimes, Disk Utility can’t repair the MacBook hard drive due to some technical issue. Try to boot your Mac in the Single User Mode and use the file-system-consistency-check command in such a situation. This Single User method is applicable if your Mac doesn’t have a firmware password or the Mac runs on High Sierra or earlier macOS versions. The steps to use the fsck command in single-user mode are as follows:
- Start or restart your Mac, then immediately press and hold Command + S hotkey.
- Release the key when some white text appears on a black screen—Mac boots into Single User mode.
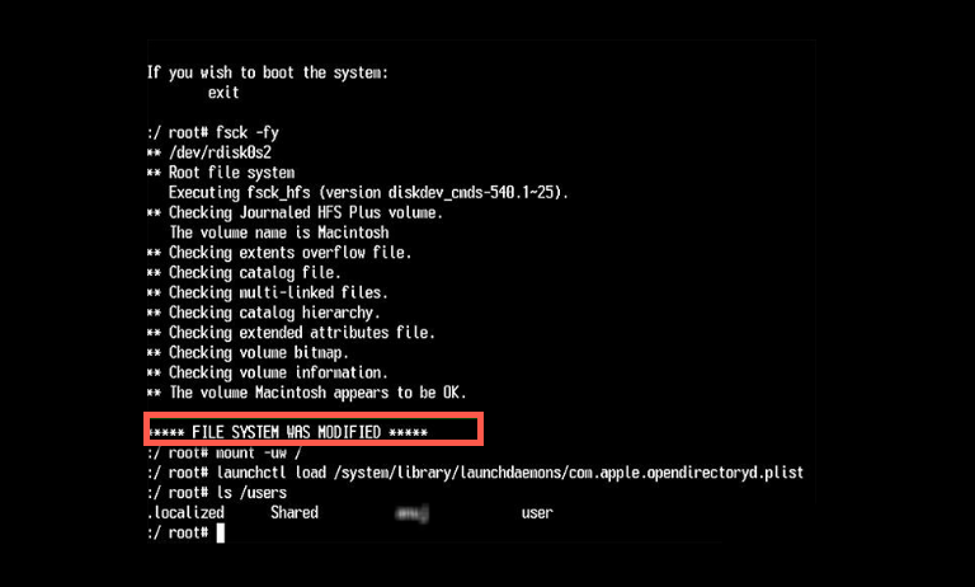
- Type the command /sbin/fsck – fy in the command line, then press Return.
- You’ll get the message “The Volume (name) appears to be OK” if the startup disk is fixed. In such a case, restart your Mac and let it boot normally.
- If the fsck command repaired the damaged MacBook hard drive, you’d get the message “File System Was Modified.”
f) Re-run the fsck command till you get the OK message. Restart your Mac normally.
Assuredly, your MacBook’s hard drive is fixed. If it is not, proceed to the following method to recover your data.
Recover Data from MacBook’s Hard Drive
If the hard drive’s corruption is beyond the repair capability of First Aid or FSCK command, try to back up data from the drive using Time Machine. If you can’t access your Mac hard drive, access data from the MacBook’s hard drive using Target Disk mode. Or, use advanced Mac data recovery software to scan and recover data from the MacBook’s hard drive. Once data recovery is made, format the MacBook’s hard drive using Disk Utility in macOS Recovery mode and reinstall macOS.
Visit the Nearest MacBook Repair Shop
When the MacBook’s hard drive has bad sectors or has any other physical damage, you need to replace the drive with a new one, preferably an SSD. You can visit the nearest MacBook repair shop to get it done when you can’t do it yourself. If your data present on the failed MacBook hard drive is essential, then take the help of a data recovery service to recover your lost data. A recovery service company uses class 100 cleanroom and other advanced tools and technology to retrieve data from the defunct hard drive.
Conclusion
When your MacBook isn’t in the warranty period, repairing the failing hard drive all by yourself is pretty cost-effective. It’ll save you a lot of money in fixing the non-warranty MacBook from Genius Bar. Start the troubleshooting process by running First Aid in macOS Recovery mode. If the method fails, use the fsck command in Single User Mode. When both First Aid and FSCK command didn’t help, back up the hard drive using Time Machine. If you can’t back up, then recover data using a free Mac data recovery software. Once data is recovered, format the drive, and reinstall macOS. If the hard drive has physical damage and can’t be fixed, replace it with a new one. If the data is essential, you can read this guide to perform MacBook hard drive recovery.
Laila Azzahra is a professional writer and blogger that loves to write about technology, business, entertainment, science, and health.